Alright so I finally got around to tackling that Pink Pony Club fan gift project. Man, inspiration hit me last week after that awesome livestream event they did. Saw someone rocking a really cool, obviously homemade shirt in the chat and thought, “Yeah, I gotta try making some merch stuff myself.” Gifts for my buddies who are just as obsessed, you know?
Getting the Stuff Together First
Right, first step was figuring out what I actually wanted to make. Brain went wild – mugs? Tote bags? But shirts and little stickers seemed like the easiest place to start. My wallet wasn’t feeling fancy printing services, so I decided to go the DIY route. Headed to the big craft store downtown.
Found myself wandering the aisles like a lost pony. Grabbed:
- A pack of plain white tees (cheap ones, in case I messed up)
- Some blank sticker sheets for printers
- Special “printer ink” fabric stuff for the shirts
- Decent photo paper for the stickers
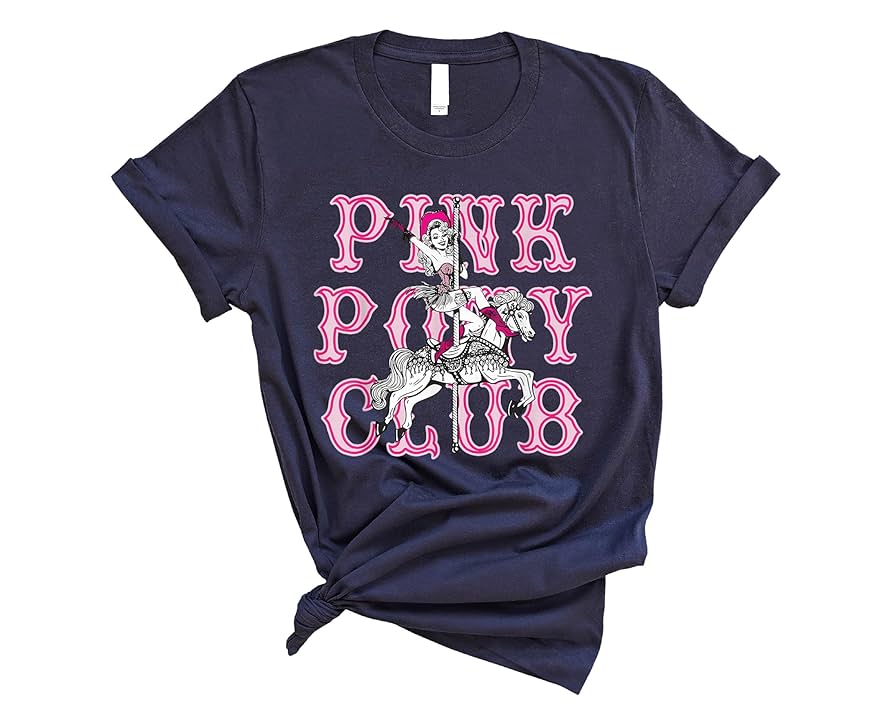
Then the big hunt – finding good quality Pink Pony Club pictures! Searched the fan forums for ages. Wanted that iconic little pink pony logo sharp. Finally saved a couple high-res versions that looked legit enough for personal stuff. Definitely didn’t wanna steal, just good fan art and clean logos.
Printing Disaster (Almost)
Got home, fired up the computer. Pulled the images into a basic document program. Sized up the big logo for the center of the shirts, played with smaller designs for the sleeves. This took longer than I expected! Alignment is tricky.
Okay, time to print. Loaded the special fabric paper… and held my breath. First print came out way too light! Like a ghost pony. Panicked for a sec. Dug out the printer settings, turned the quality up to “Best Photo” and hit print again. Phew! Colors popped this time. Deep pink, nice and crisp. Did the stickers on the photo paper next – way easier, printed fine first go.
Ironing Like Crazy
Here’s where the real work kicked in. Following the fabric paper instructions is key. Preheated my iron – gotta get it good and hot. Laid the shirt flat on my kitchen counter, threw a towel down underneath (learned that lesson the hard way years ago!). Carefully placed the printed design right where I wanted it on the front.
Then? Pressed down HARD with that iron. Seriously, used all my weight. Counted the seconds out loud like some weird ritual. Moved that iron slowly over every inch for the full time it said. Flipped the shirt over and ironed the back too, towel inside protecting the other side. The heat and pressure smell is… unique. Did this for each shirt. Messed up slightly on the first one – slightly off-center – but hey, adds charm, right?
Stickers and Showtime
The stickers were the easy victory lap. Just carefully peeled off the backing sheet and stuck ’em to anything sturdy – laptop lids, notebooks, water bottles. Done.
Finally cooled everything down, checked the transfers. Shook the shirts out. They felt a little stiff where the ink was, but washing them later should fix that. The colors? Held up nice! Vibrant. The stickers looked pro.
Threw Some Together for the Crew
Gathered it all up – shirts folded kinda messy, stickers tucked into little baggies I had lying around. Not winning any packaging awards, but it’s the thought, right? Handed ’em out to my friends this weekend before we watched the new episode.
The grins were instant. Total “You made this?!” vibes. Watching them put the shirts on right then? That was the payoff. Seeing them stick those pony stickers on their stuff days later? Even better. Felt pretty damn satisfying making something cool and personal like that, even if it involved wrestling with a stubborn iron.
Seriously, if you’re even slightly crafty, try it. Makes the fandom feel way more real.